Everyone is obsessed with these (in the blogging forums) and there are heaps of tutorials on how to do them. And here is my version!
Hopefully I will get an outift post using the Miu Miu collar.. but at the moment the weather is terrible..So, I wouldnt be able to get a good shot.
Here's what they look like:
it will set you back a couple of hundred dollars :O
What you're going to need:
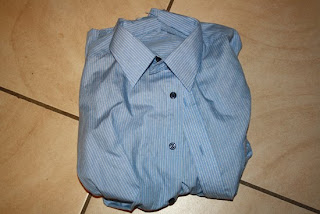
Men's shirt with a sturdy collar, I got this from target for about $3
Scicors, Transfer paper, Needle and Thread (optional) and Elastic (optional)
(the trander paper - Big W $16) I know.. its quite expensive.. but you get multiple uses out of it.
1.
So obviously, you gots to cut the collar. Big tip here would be to cut as close as you can to the seam, so you dont have to go back and fix the seam. A great pair of fabric scicors helps a deal.
this next step is optional..
2.
I cut my collar in half and wanted to extend the collar a lil, so it wouldnt choke me to death, and I did that by attaching some elastic in between the two halves. Now I could have used the material from the shirt.. but I didint want to waste the shirt by cutting bits off of it. It actually looks cool, without a collar.
3.
Attach the elastic to the collar, by needle and thread. As secure as you can and as clean as you can..
4.
Now you want to obviously print out a design and transfer it on to the collar. I stuck with the traditional swallow print. I found my print here (thanks to the amazing DIY bloggers: Cocorosa who lets us borrow her template) You could go for the naked people print, or the cats and dogs one.. or something completely original.. why not draw something? Then print it out, and follow the transfer paper instructions.
IMPORTANT: You want to lie your collar flat (duh kazz!) when ironing on the transfer.
AND YOU ARE DONE :D
I think it looks cool, especially a lil different to the originals.. cause of the slight pin stripe of the fabric.


No comments:
Post a Comment
Oh hello,